Introduction
Import-meta-env is a startup/runtime environment variable solution for JavaScript, it provides a set of transform plugins and tools designed to help you develop applications according to the 12-factor principle.
Published Packages


Guide
In this guide, we will use Webpack as an example, but you can also use other build tools. All supported build tools can be found on the compile-time transform plugins page.
Write your code
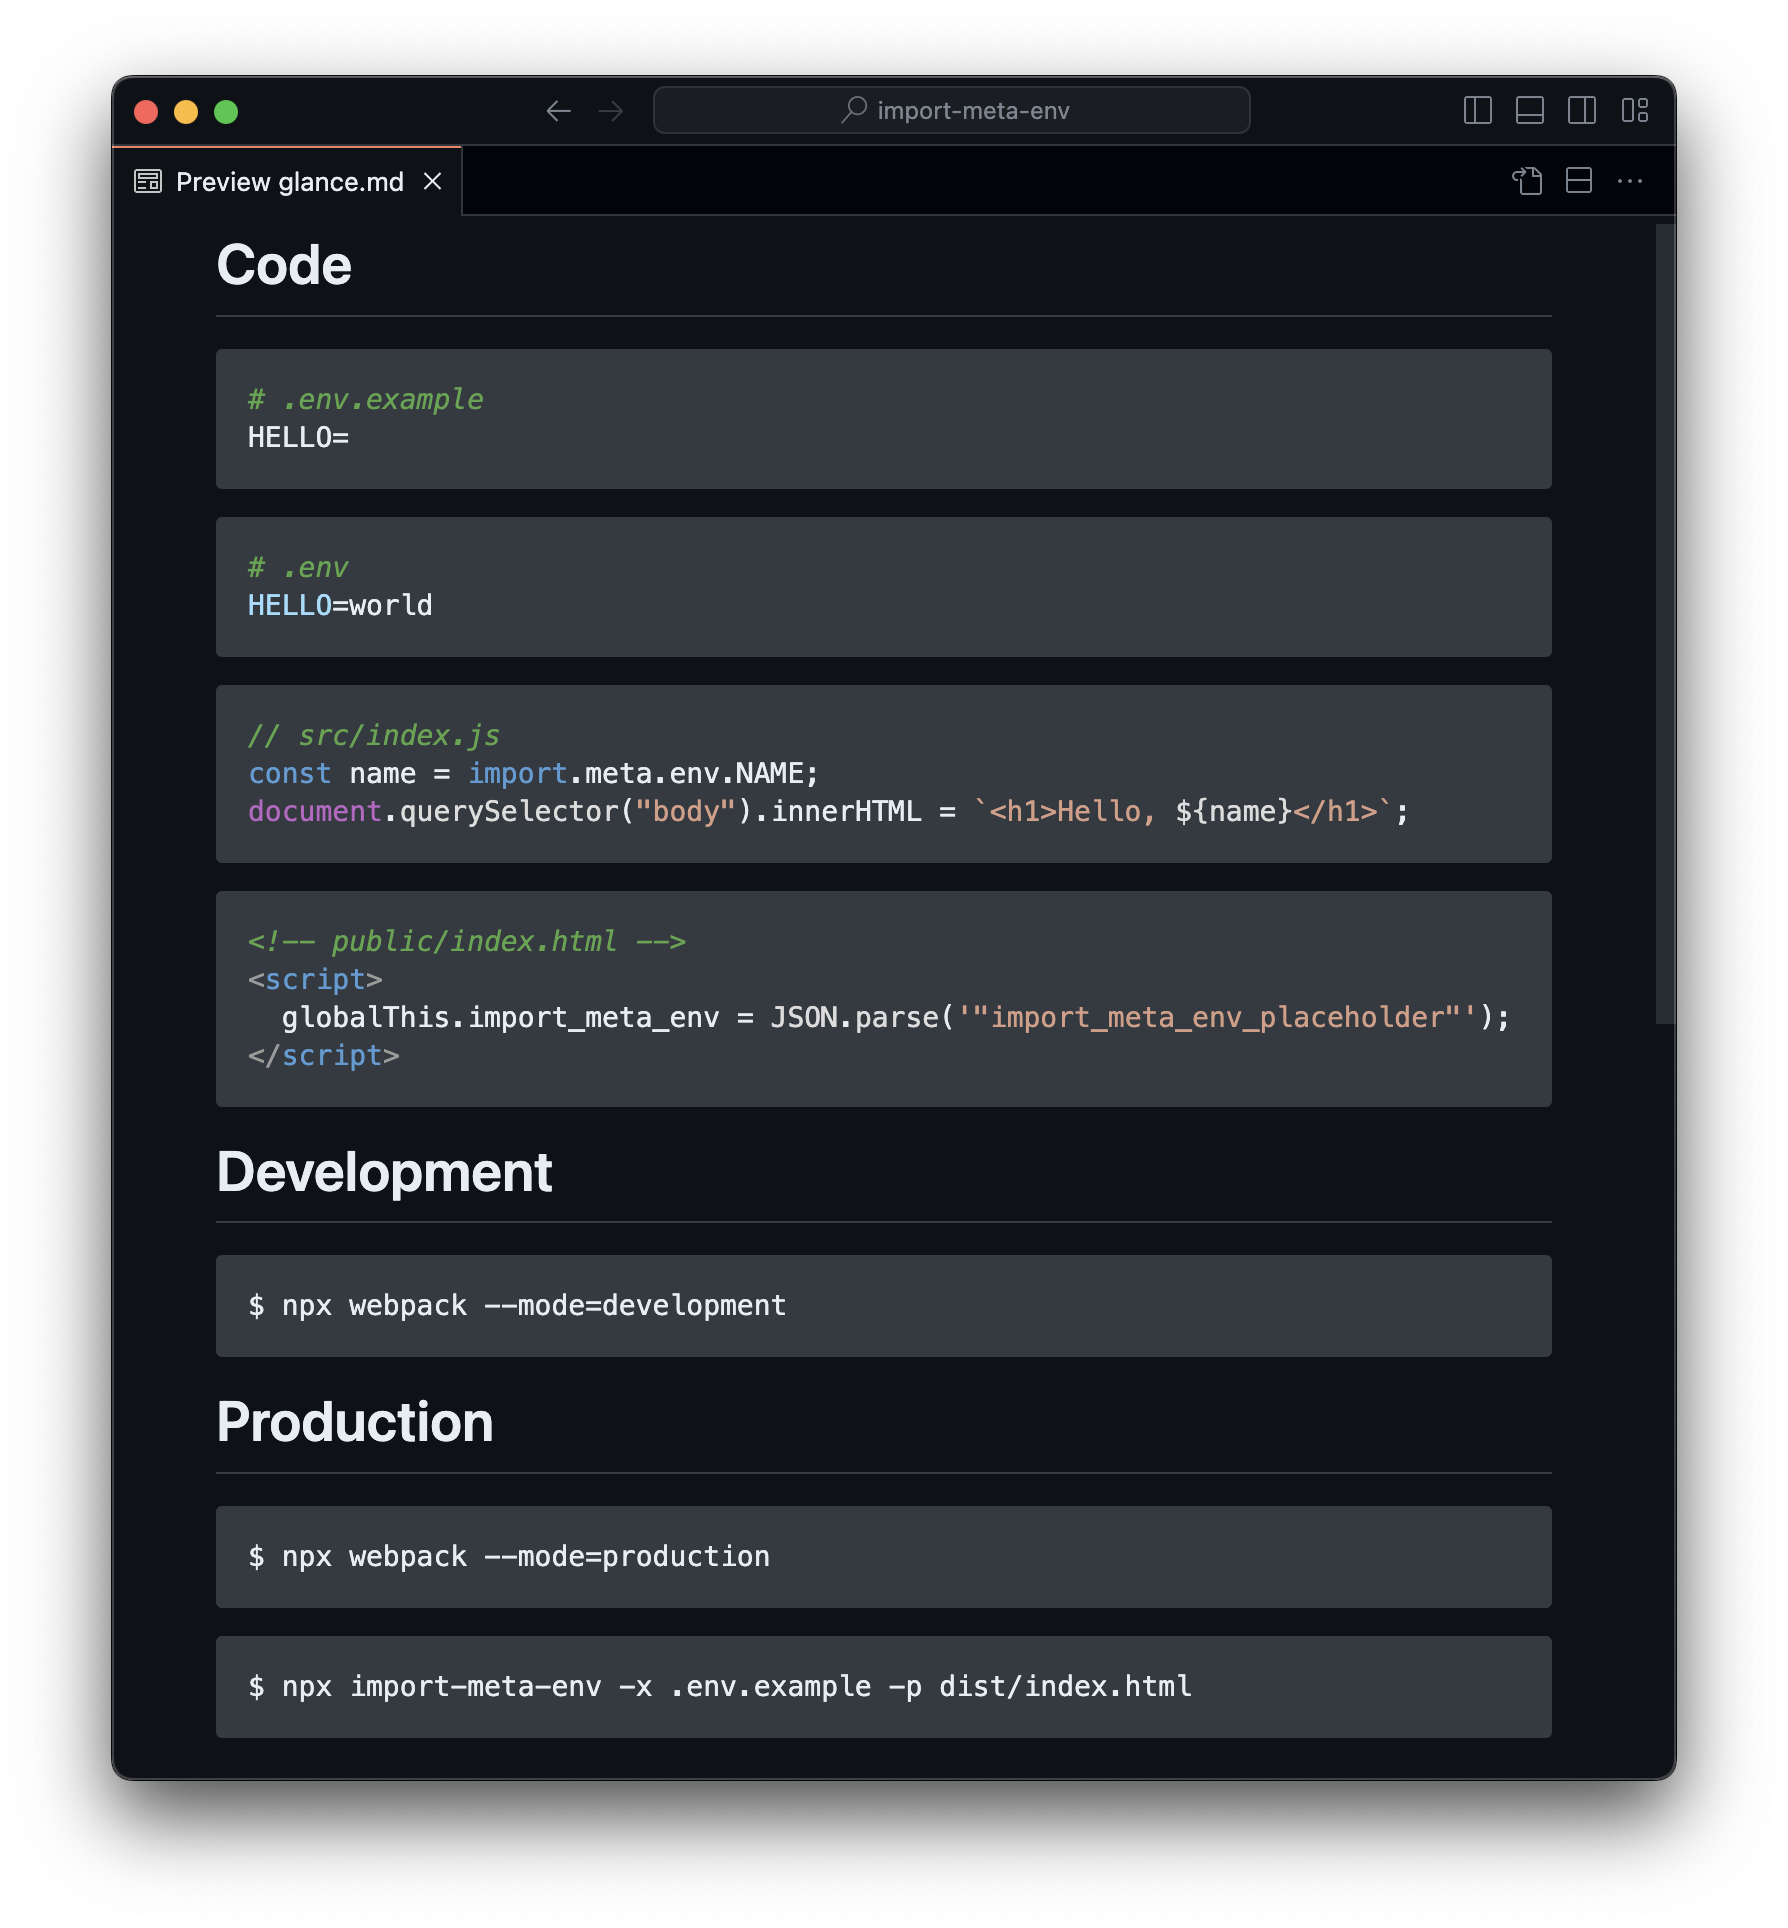
To prevent accidentally leaking environment variables to the client, you need to list public environment variables in an example file (e.g.,
.env.example):ini# .env.example NAME=# .env.example NAME=See the
.env.example filesection for details.Obtain the environment variable:
diff// src/index.js - const name = process.env.NAME + const name = import.meta.env.NAME document.querySelector("body").innerHTML = `<h1>Hello, ${name}</h1>`;// src/index.js - const name = process.env.NAME + const name = import.meta.env.NAME document.querySelector("body").innerHTML = `<h1>Hello, ${name}</h1>`;See the syntax section for details.
Transform it
Install dotenv in order for Import-meta-env packages to work:
$ npm i -D dotenv$ npm i -D dotenvDuring development and testing:
Define environment variables:
ini# .env NAME=development# .env NAME=developmentSee the
.envfile section for details.Install and setup compile-time transform plugins.
sh$ npm i -D @import-meta-env/unplugin$ npm i -D @import-meta-env/unplugindiff// webpack.config.js module.exports = { plugins: [ + require("@import-meta-env/unplugin").webpack({ + env: ".env", + example: ".env.example", + transformMode: "compile-time", + }), ], };// webpack.config.js module.exports = { plugins: [ + require("@import-meta-env/unplugin").webpack({ + env: ".env", + example: ".env.example", + transformMode: "compile-time", + }), ], };Transform it:
sh$ npx webpack --mode=development$ npx webpack --mode=developmentdiff// dist/main.js - const name = import.meta.env.NAME + const name = "developemnt" // ...// dist/main.js - const name = import.meta.env.NAME + const name = "developemnt" // ...
During production:
Install and setup compile-time transform plugins.
sh$ npm i -D @import-meta-env/unplugin$ npm i -D @import-meta-env/unplugindiff// webpack.config.js module.exports = { plugins: [ require("@import-meta-env/unplugin").webpack({ env: ".env", example: ".env.example", - transformMode: "compile-time", + // If you are using popular packagers such as Webpack and Vite, + // @import-meta-env/unplugin will automatically switch the `transformMode` for you: + // - for development mode, `transformMode` will be `"compile-time"` + // - for production mode, `transformMode` will be `"runtime"` + + // Otherwise, you need to set `transformMode` according to your needs: + transformMode: "runtime", }), ], };// webpack.config.js module.exports = { plugins: [ require("@import-meta-env/unplugin").webpack({ env: ".env", example: ".env.example", - transformMode: "compile-time", + // If you are using popular packagers such as Webpack and Vite, + // @import-meta-env/unplugin will automatically switch the `transformMode` for you: + // - for development mode, `transformMode` will be `"compile-time"` + // - for production mode, `transformMode` will be `"runtime"` + + // Otherwise, you need to set `transformMode` according to your needs: + transformMode: "runtime", }), ], };Transform it:
sh$ npx webpack --mode=production$ npx webpack --mode=productiondiff// dist/main.js - const name = import.meta.env.NAME + const name = globalThis.import_meta_env.NAME // ...// dist/main.js - const name = import.meta.env.NAME + const name = globalThis.import_meta_env.NAME // ...In order to obtain environment variables from
globalThis.import_meta_env, you also need to add a special expression before your entry:diff<!-- public/index.html --> <!DOCTYPE html> <html lang="en"> <head> <meta charset="UTF-8" /> + <script> + globalThis.import_meta_env = JSON.parse('"import_meta_env_placeholder"') + </script> </head> </html><!-- public/index.html --> <!DOCTYPE html> <html lang="en"> <head> <meta charset="UTF-8" /> + <script> + globalThis.import_meta_env = JSON.parse('"import_meta_env_placeholder"') + </script> </head> </html>See the special expression section for details.
Define environment variables:
ini# .env NAME=production# .env NAME=productionSee the
.envfile section for details.Install runtime transform tool.
sh$ npm i -D @import-meta-env/cli$ npm i -D @import-meta-env/cliTransform it again:
shnpx import-meta-env -x .env.example -p dist/index.htmlnpx import-meta-env -x .env.example -p dist/index.htmldiff<!-- dist/index.html --> <!DOCTYPE html> <html lang="en"> <head> <meta charset="UTF-8" /> <script> - globalThis.import_meta_env = JSON.parse('"import_meta_env_placeholder"') + globalThis.import_meta_env = JSON.parse('{"NAME":"production"}'); </script> <script defer="defer" src="main.js"></script> </head> </html><!-- dist/index.html --> <!DOCTYPE html> <html lang="en"> <head> <meta charset="UTF-8" /> <script> - globalThis.import_meta_env = JSON.parse('"import_meta_env_placeholder"') + globalThis.import_meta_env = JSON.parse('{"NAME":"production"}'); </script> <script defer="defer" src="main.js"></script> </head> </html>
See the transform section for details.
You can find the corresponding working example here, and all examples here.
.env File
By default, Import-meta-env will load environment variables from your system and the .env file (you can change or disable this using env option):
$ export NAME=world$ export NAME=world# .env
NAME=world# .env
NAME=worldWARNING
You should gitignore this file because these environment variables are usually used for local development purposes, while your production environment variables are usually stored in your cloud, such as GCP or AWS, and will be loaded from the system.
TIP
It is common to temporarily change environment variables for debugging or other purposes. You can use @import-meta-env/prepare to automatically generate the final .env file from .env.local, .env.local.defaults, etc. files.
.env.example File
To prevent accidentally leaking environment variables to the client, only keys listed in an example file (e.g., .env.example) are exposed.
For example, if you have these config:
$ export NAME=world
$ export SECRET_KEY=****
$ export NAME=world
$ export SECRET_KEY=****# .env.example
NAME=this-value-can-be-anything# .env.example
NAME=this-value-can-be-anythingthen only NAME will be exposed to your client source code, but SECRET_KEY will not.
INFO
For security reason, the example option does not have default value, you have to explicitly define it.
WARNING
Since any environment variables exposed to your source code will end up in your client bundle, the keys listed in .env.example should not contain any sensitive information.
Syntax
Import-meta-env exposes your environment variables on special environment variable expressions:
import.meta.env.FOO;
import.meta.env.BAR;
// ...import.meta.env.FOO;
import.meta.env.BAR;
// ...INFO
Since these environment variables expression are statically transformed. It is therefore necessary to always reference them using the full static string.
In other words, the following are invalid:
- Entire object access, i.e.
import.meta.env - Computed key access, e.g.
import.meta.env["FOO"]
Transform
Import-meta-env provides two sets of transform:
In development and testing, you use the compile-time transform plugins to replace the environment variable expressions with environment variable strings.
In production, you need to use the compile-time transform plugins to replace the environment variable expressions with global accessors (in order to access to a special object), and then use runtime transform tool to inject environment variables to the special expression.
Compile-time Transform Modes
Since compile-time transform plugins will be used in two scenarios, it have two transform modes:
compile-time: statically replaceiwithmport.meta.env.KEY "value"runtime: statically replaceiwith a global accessormport.meta.env
Usually, you don't need to define it explicitly, because Import-meta-env determines it automatically based on your environment variables (e.g., p). See API for details.
Special Expression
In order to inject environment variables in production, you also need to add a special expression in your app:
globalThis.import_meta_env = JSON.parse('"import_meta_env_placeholder"');globalThis.import_meta_env = JSON.parse('"import_meta_env_placeholder"');This expression will be replaced with environment variables by using runtime transform tool as follows:
globalThis.import_meta_env = JSON.parse('{"NAME":"world"}');globalThis.import_meta_env = JSON.parse('{"NAME":"world"}');We encourage you to put this special expression in your index.html because the Cache-Control header is usually set to no-cache when requesting index.html:
<!doctype html>
<html lang="en">
  <head>
    <meta charset="UTF-8" />
    ...
  </head>
  <body>
    ...
    <script>
      globalThis.import_meta_env = JSON.parse('"import_meta_env_placeholder"');
    </script>
    <script src="src/index.js"></script>
  </body>
</html><!doctype html>
<html lang="en">
<head>
<meta charset="UTF-8" />
...
</head>
<body>
...
<script>
globalThis.import_meta_env = JSON.parse('"import_meta_env_placeholder"');
</script>
<script src="src/index.js"></script>
</body>
</html>WARNING
The value of the expression will be statically replaced, the following will not work:
globalThis.import_meta_env = JSON.parse(
  '"import_meta_env_placeholder"'
);

globalThis.import_meta_env = JSON.parse('"import_meta_env" + "_placeholder"');

const placeholder = '"import_meta_env_placeholder"';
globalThis.import_meta_env = JSON.parse(placeholder);
globalThis.import_meta_env = JSON.parse(
'"import_meta_env_placeholder"'
);
globalThis.import_meta_env = JSON.parse('"import_meta_env" + "_placeholder"');
const placeholder = '"import_meta_env_placeholder"';
globalThis.import_meta_env = JSON.parse(placeholder);INFO
This expression should be placed before or at the top of your entry script, otherwise your code will end up with a TypeError:
Uncaught TypeError: Cannot read properties of undefined (reading 'NAME')
  at ...
Uncaught TypeError: Cannot read properties of undefined (reading 'NAME')
at ...